


温馨提示:本文最后更新于
2024-04-26 20:48:47,某些文章具有时效性,若有错误或已失效,请在下方留言。安装说明
1. 下载最新的源码解压到网站目录
cd /var/www/
wget https://github.com/yumusb/autoPicCdn/archive/master.zip
unzip master.zip
mv autoPicCdn-master picurl
chown -R www-data:www-data piurl
chmod -R 755 picurl
2. 创建数据库并导入
create database pic DEFAULT CHARSET utf8 COLLATE utf8_general_ci;
grant all privileges on `pic`.* to 'root'@'localhost' identified by '123456';
flush privileges;
导入本地数据库
source /var/www/picurl/pic.sql
\q
i> up.ini配置数据库文件
$database = array(
        'dbname' => 'YourDbName',//你的数据库名字
        'host' => 'localhost',
        'port' => 3306,
        'user' => 'YourDbUser',//你的数据库用户名
        'pass' => 'YourDbPass',//你的数据库用户名对应的密码
    );
$table = 'remote_imgs'; //表名字
3.配置上传类型
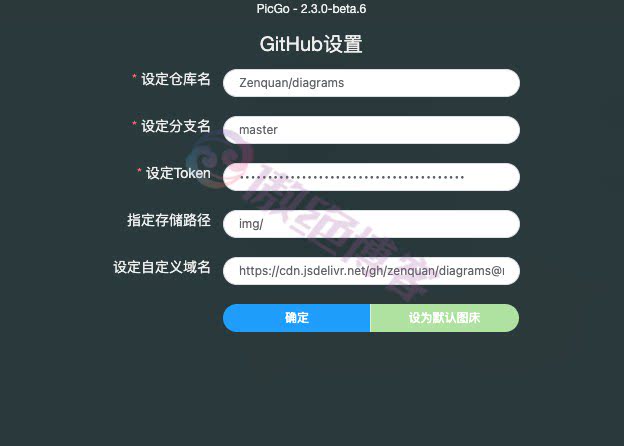
选择Github
https://github.com/settings/tokens 去这个页面生成一个有写权限的token(repo:Full control of private repositories 和write:packages前打勾)然后配置up.php中的相关字段。
define("TYPE","GITHUB");//选择github
define("USER","pic-cdn");//你的GitHub/Gitee的用户名
define("REPO","cdn2");//必须是上面用户名下的 公开仓库
define("MAIL","你的邮箱");//邮箱无所谓,随便写
define("TOKEN","YourToken");
选择Gitee
去往这个页面 https://gitee.com/personal_access_tokens 生成你的token,然后建立空白仓库且初始化master分支。可以看这里 https://gitee.com/help/articles/4122 然后配置up.php的字段。
define("TYPE","GITEE");//选择gitee
define("USER","pic-cdn");//你的GitHub/Gitee的用户名
define("REPO","cdn2");//必须是上面用户名下的 公开仓库
define("MAIL","你的邮箱");//邮箱无所谓,随便写
define("TOKEN","YourToken");
注意:国内主机可能无法访问api.github.com,需要修改hosts解析
© 版权声明
THE END


暂无评论内容